
Turn the activity light on or off
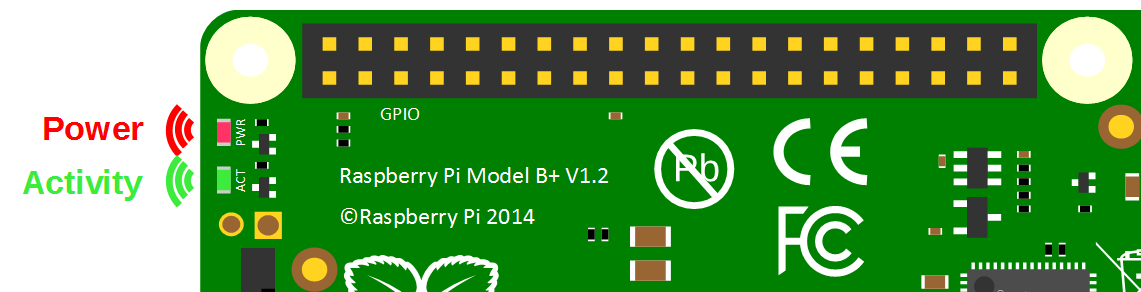
The main board on the Raspberry Pi has power and activity LEDs to indicate when power has been applied (red) and when the on-board SD card is being accessed (green). These are situated on the opposite end of the board to the Ethernet connector on the B models. They can however be on different sides of the display ribbon connector depending on which B model.
Embarrassingly, I have found that when running multiple Raspberry Pi’s I have forgotten which ones are running which software or operating system (This is what I get for writing books on monitoring, Ghost, ownCloud etc). This is exacerbated by mounting the Pis in an open stack configuration similar to the following (Imagine it as a slightly higher stack).
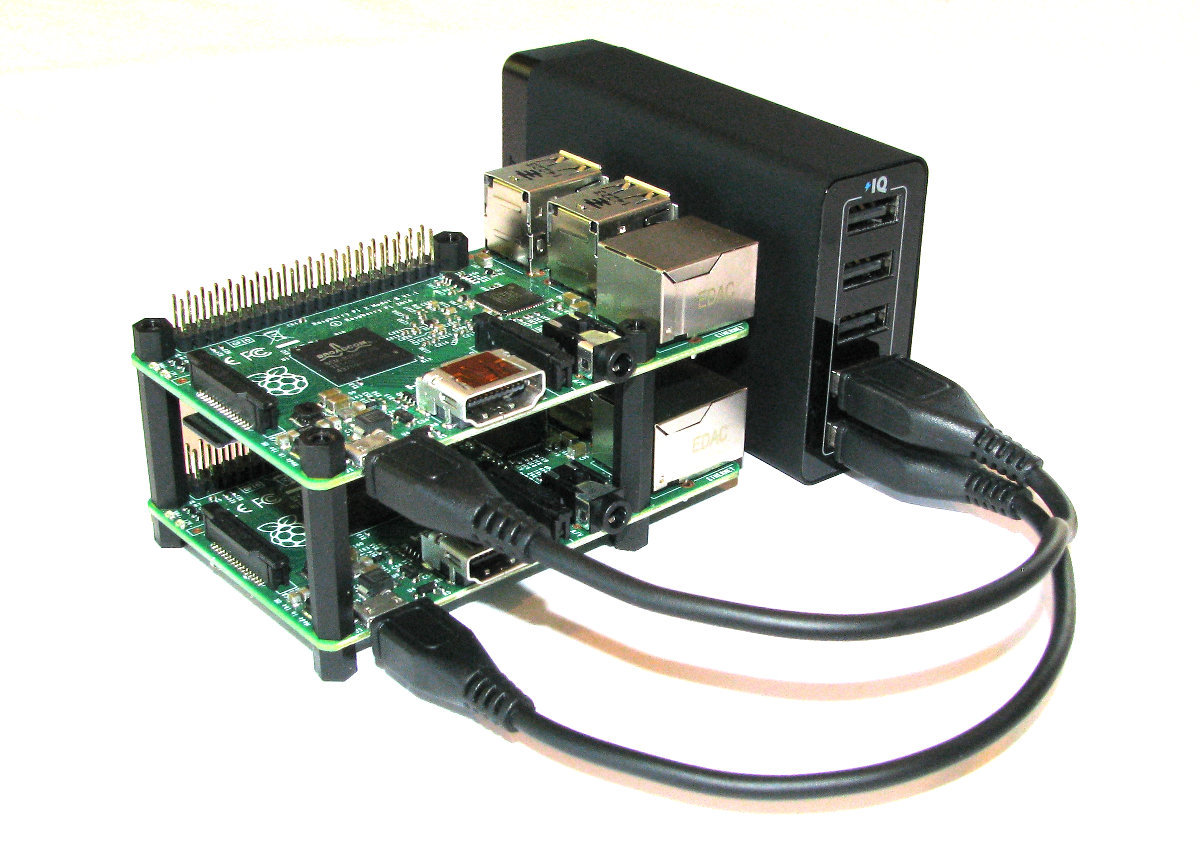
What to do then when faced with a stack o’ Pi and difficulty in telling which is which?
The good news is that we can log into each and force the activity LED to illuminate and hence identify each device.
Cut to the chase and just do it
The first thing we need to do is to set the trigger for the activity LED to GPIO mode;
Then we can turn the LED on by writing a ‘1’ to the ‘led0’ brightness file with the following command;
If we want to turn it off we write a ‘0’ like so;
And to return it to the state where it indicates activity on the SD card we use mmc0 which is shorthand for multi media card 0 (or the SD card);
The explanation of how it works
The /sys directory exists as an interface between the kernel-space and the user-space. As such it is an implementation of the system file system (sysfs). The /sys/class subdirectory is exported by the kernel at runtime and presents devices on the system as a ‘class’ in the sense that it abstracts out the detailed implementation that might otherwise be exposed (the example used in the ‘makelinux’ description of classes is that a driver might see a SCSI or ATA disk, but as a class they are all just ‘disks’).
The following is a highly abridged hierarchy of the /sys/class directory where we can see the range of classes and their respective links.
The leds class contains directories for ‘led0’ and ‘led1’.
Inside this directory are the trigger file which determines which kernel modules activity will flash the led and the brightness file that will determine the brightness (duh!) of the led.
If we cat the trigger file we can see that there is a range of different things that can be used as the trigger to illuminate the led.
The multimedia card (mmc0) is set as the default.
The led can only have two levels of brightness; ‘on’ or ‘off’. This corresponds to a ‘0’ or a ‘1’ respectively. To illuminate our led all we have to do therefore is to signal the brightness file that it has the value ‘1’ (per the example above).
To revert to control of the brightness we echo the device responsible for controlling the led to the trigger file. In this case for the activity led it is the ‘mmc0’ device.