
Controlling a Servo from the Raspberry Pi Pico
What is a Servo Motor?
Servo motors are types of motors that have been designed to rotate precisely in response to control signals. They are commonly used in applications such as robotics and remote control vehicles to provide a specific angle or distance of movement.
They are rated in kg/cm (kilogram per centimetre) which translates as how much weight the servo motor can lift at a particular distance. For example: A 5kg/cm servo motor should be able to lift 5kg when its load is suspended 1cm from the motors shaft, the greater the distance of the weight from the shaft, the less the weight lifting capacity.
I've written this short explanation as part of the much larger book 'Raspberry Pi Pico Tips and Tricks'. You can download it for free (or donate if you wish) from here.
How does a Servo Motor Work?
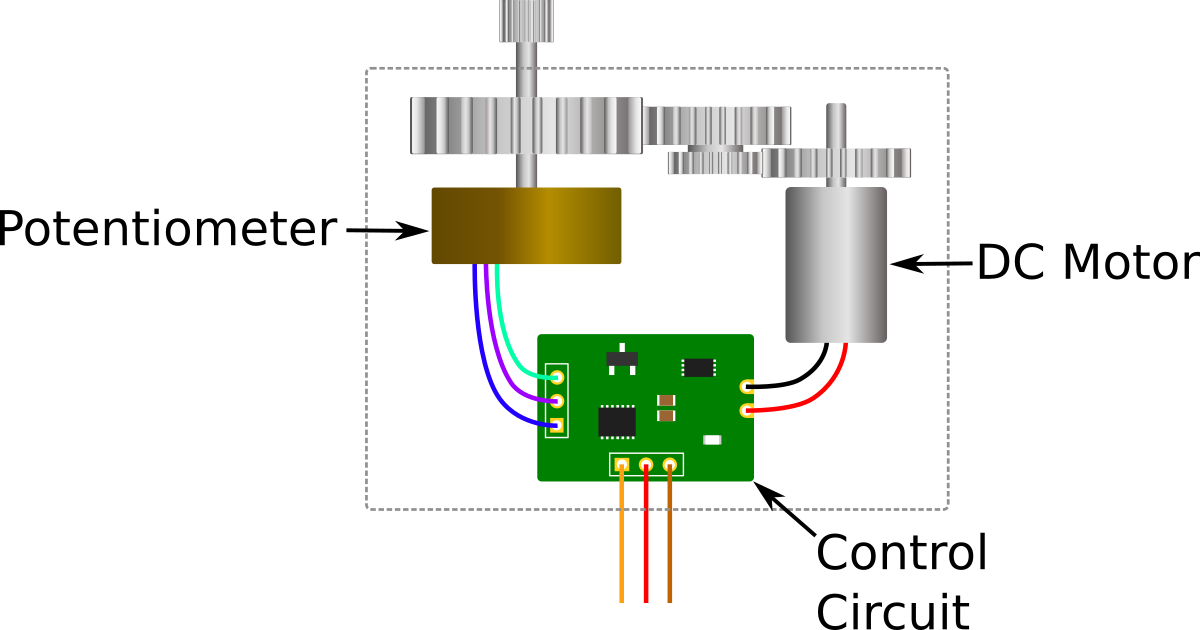
A servo motor can use an AC or DC motor as its driving force and this is one of the many different methods of describing them. In a very simple example, a DC servo motor will employ a simple DC motor, gears, a potentiometer and a control circuit. In response to an input signal on the control circuit, the motor and the gears rotate and the potentiometer’s resistance changes. This provides feedback to the control circuit which regulates how much movement there is and in which direction.
How is a Servo Motor Controlled?
A typical servo motor will have three wires. Two for power supply (positive and ground) and one for the controlling signal.
The controlling signal is a pulse of variable width, and thus the controlling mechanism is named Pulse Width Modulation (PWM). A pulse is sent every 20 milliseconds. The width of the pulses determine the position of the shaft. So, a pulse width of 1ms will move the shaft anticlockwise by 90°, a pulse of 1.5ms will move the shaft to a ‘neutral’ position at 0° and a pulse of 2ms will move the shaft clockwise by +90°.

A typical servo motor will only turn 90° in either direction and will have a mechanical stop to prevent further movement.
When a servos is commanded to move, it will move to the position specified by the pulse width and hold that position. The maximum amount of force the servo can exert is called the torque rating of the servo. As an example of this force, when we are running our code below and the servo motor is connected and powered on, try (gently) to move the arm. There should be a reasonable resistance. If you disconnect the power the servo can be moved relatively easily.
Connecting Everything Up to the Pico
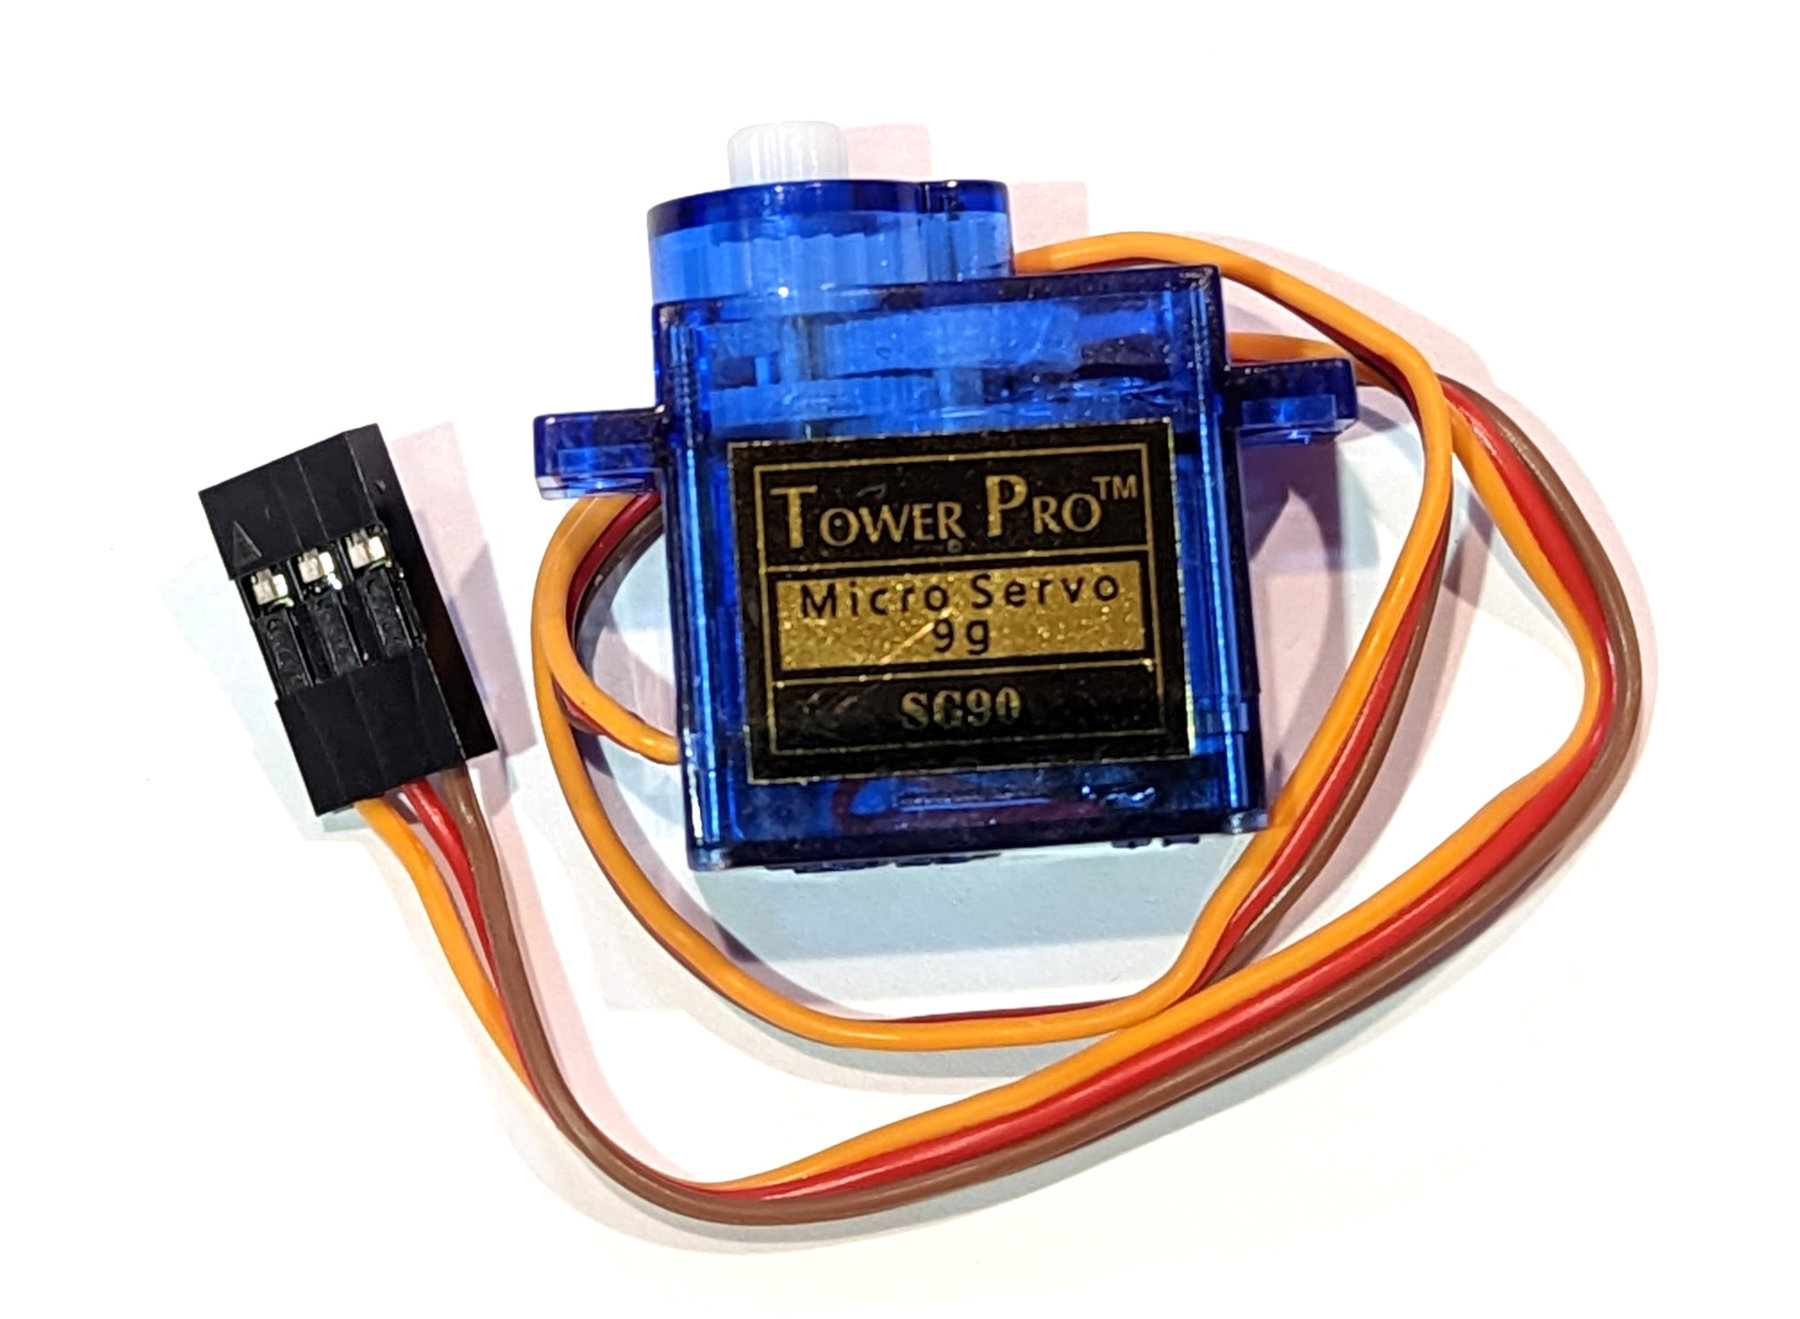
The example shown here uses a SG90 micro servo. It is a very small and inexpensive servo that can rotate approximately 180 degrees (90 in each direction). These are immensely popular for simple jobs or learning about the principles of servos. It typically comes with 3 arms and fixing hardware. Its operating voltage is from 4.8V to 6V and at 4.8V it has a torque of 2.0kg/cm and will move through 60° in 0.1s.
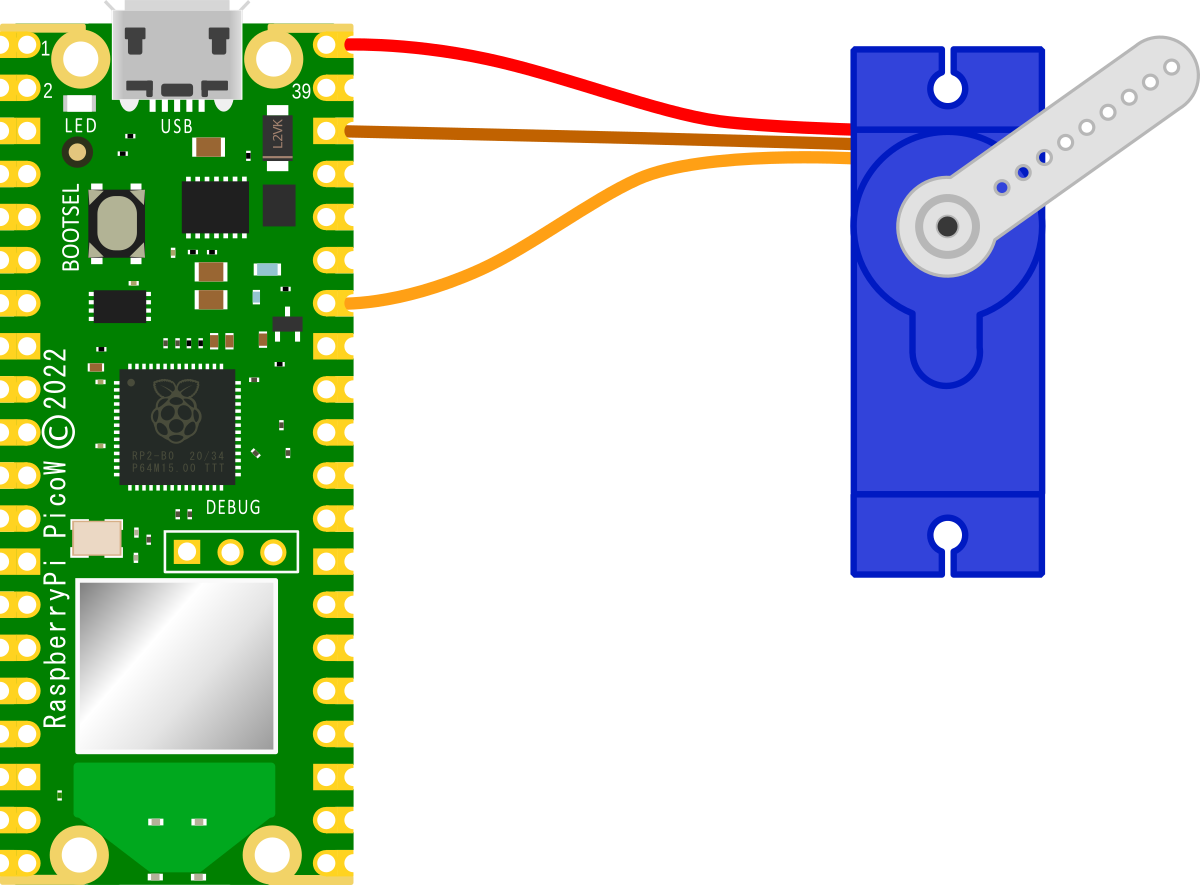
We will connect;
- The red wire (VCC) to the VBUS pin (40) on the Pico (this makes the assumption that we are powering our Pico from a source connected to the micro USB connector with the standard 5V applied)
- The brown wire (Ground) to the ground pin (38) on the Pico
- The orange wire (the PWM signal) to GP28 (pin 34) on the Pico
All of the GP pins on the Pico can be used for pulse width modulation control. This is because the RP2040 has 8 identical PWM ‘slices’, each with two output channels (A/B), where the B pin can also be used as an input for frequency / duty cycle measurement. This means that each slice can drive two PWM output signals, or measure the frequency / duty cycle of an input signal. This provides a total of up to 16 controllable PWM outputs.
Since all of the GP pins can be driven by the PWM block, it’s just a matter of selecting which one you would like to use.
I selected GP28 (pin 34) for no better reason than it made drawing the connection diagram prettier!
While the SG90 comes with it’s wires terminated in a 3 way du-pont connector, in order to make the connection to our header pins simple, replace the 3 way connector with three single pins.

Code
The code below will designate the GP pin to be used as an output (GP28) and the frequency of the signal (50Hz (which equates to a period of 20ms)).
The aim is to sweep the servo through an arc of 180 degrees and then back again.
We then use two while loops to move the servo from a pulse width of 0.52ms to 2.6ms and then back again in an endless loop. Now, I’ll be the first to admit that this does not equate with the expected values of 1ms and 2ms. I have selected the values in the code, because that’s what roughly equates to the -90 and +90 degrees of movement. Why is it not nore accurate? Good question. I tried a few iterations including using duty_u16 (from 3277 to 6554) instead of duty_ns, but it still didn’t seem to work accurately. I suppose my takeaway is that the servo is particularly cheap and maybe I got what I paid for. Irrespective, it was possible to manually calibrate the servo to discover appropriate values.
import time
from machine import Pin, PWM

pwm = PWM(Pin(28))
pwm.freq(50)

while True:
    for pulse in range(520,2600,10):
        pwm.duty_ns(pulse*1000)
        time.sleep_ms(5)
    for pulse in range(2600,520,-10):
        pwm.duty_ns(pulse*1000)
        time.sleep_ms(5)
Warning
I initially operated the servo in it’s sweeping motion while my cat was nearby. She quickly took an interest and had a bit of a play with it.

Later I heard a strange noise from the office and found her up on the desk investigating it some more. I have since found that I can operate it and she will quickly come and investigate what’s happening. In short, she’s obsessed. I now have to keep the office door shut.
So fair warning.
Don't forget, if you're looking for the book 'Raspberry Pi Pico Tips and Tricks'. You can download it for free (or donate if you wish) from here.
No comments:
Post a Comment